
Quote of the Day
The gods do not deduct from a man's allotted span the hours spent in fishing.
— Babylonian Proverb
Introduction
When an electrical engineer asks me what my specialty is, I always respond that I am an analog designer. I love designing analog electronics. Even though I am now in management and am not allowed to design analog electronics professionally anymore, I still design analog electronics in my spare time. As with all professions, analog design has its superstars. When I think about who the analog design superstars are, three names come to mind.
Everything these folks publish should be closely studied by all analog designers. I thought I would spend a little time going over one Woodward's designs. There is an elegance to his work that I find very interesting and his designs always draw me in.
Analysis
This post is review of an article in Electronics Design. I do not want to bore the general audience with the little details that analog people like to dwell on. In this post, I will simply walk through the high-level details. This will give people a little feel for the kind of analysis that occurs in these circuits.
High-Level View
The basic application is an analog circuit that can determine the temperature of a remote sensor. The application block diagram view is shown in Figure 1.

Figure 1: Basic Application Block Diagram.
The basic requirements of this application are:
- Temperature must be measured with an accuracy of ±1°C.
- The sensor is driven over "long wires," which means the wires have enough resistance that the resistance cannot be neglected.
- Absolute minimum cost is critical – we do not want to spend money on processors, memory, and software.
- We want a circuit that requires simple or no calibration.
- The output of the circuit must be a voltage in the range 0 V to 10 V that is directly proportional to the temperature of the sensor over a range of temperatures from 0 °C to 100 °C.
Approach
Woodward's approach is an extension of a design by Jim Williams. The key features of the Woodward design are:
- Use an inexpensive Bipolar Junction Transistor (BJT) as a the sensor.
BJTs like the 2N2222 are cheap and the variation of a BJT's base-emitter voltage (VBE) is very predictable with temperature - Take VBE readings at three different current levels.
As will be shown below, measuring VBE at two current levels allows variations in transistor characteristics to be eliminated. Woodward adds a third current level to the algorithm, which can be used to eliminate the voltage variation due to wire losses. - Use a very clever multiplexer and difference amplifier circuit to output a voltage proportional to temperature.
Woodward stores the sensor readings that he makes on capacitors that are switched in at times that allow him to subtract the voltage reading from one another. As is shown below, this subtraction is critical to removing all component and wire loss variations.
The Sensor
Inexpensive Bipolar Junction Transistors (BJTs) that make excellent temperature sensors that cost pennies in volume. Bob Pease does a wonderful job going through the details of using a BJT as a temperature sensor. Equation 1 summarizes the nuances in this excellent article.
| Eq. 1 | 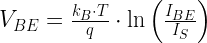 |
where
- IS is the saturation current of the base-emitter junction. It varies with each transistor.
- kB is Boltzman's constant.
- T is the temperature in Kelvin.
- VBE is the transistor's base-emitter voltage.
- IBE is the base-emitter current through the transistor.
Except for T, all the parameters in Equation 1 are constants. This means that Equation 1 varies linearly with temperature. Unfortunately, IS is a constant that varies with each transistor. Jim Williams has shown that you can eliminate the variation with IS by taking VBE readings at two current levels and subtracting the results. I duplicate his work in Equation 2.
| Eq. 2 |  |
and  |
where VBE1 is the base-emitter voltage at IBE1 and VBE2 is the base-emitter voltage at IBE2. In Equation 2, ΔVBE has a linear temperature variation and all the other parameters are not subject to component variations.
Equation 2 shows us that simply subtracting the VBE values at two different current levels will give us a value that varies directly with absolute temperature (°K). But we cannot measure VBE directly because we have losses in the wire. How do we deal with those?
Wire Losses
Figure 2 shows the the model I will use for analyzing how Woodward drives the sensor. Note that I have lumped all the wire resistance into a single variable RLoss.

Figure 2: Wire and Sensor Model.
In Equation 3, I define two variables, ΔV1 and ΔV2. ΔV1 is the difference in VLine when the stimulus is IBE = IBE2 +IBE1 and IBE = IBE1. Similarly, ΔV2 is the difference in VLine when the stimulus is IBE = IBE3 +IBE1 and IBE = IBE1. Woodward also sets IBE3=2IBE2. Woodward uses an operational amplifier hooked up as a differential amplifier to create an output voltage equal to 2ΔV1 -ΔV2. As is shown in Equation 3, this linear combination eliminates the terms due to wire loss! We now have an output voltage that varies linearly with absolute temperature (°K).
| Eq. 3 |  |
 |
|
 |
|
 |
Unfortunately, Equation 3 has a non-zero value at 0 °C because T is expressed in absolute temperature (°K). We now need to make this output voltage vary linearly with Celsius temperature (°C).
Linear Variation with °C
The final bit of analog signal processing is fairly straightforward. We have three things to do:
- Generate the linear combination 2ΔV1(T) -ΔV2(T).
This computation eliminates voltage loss other than from the transistor BE junction. - Shift this curve down by the value of 2ΔV1(273.15 °K) -ΔV2(273.15 °K).
273.15 °K is the same as 0 °C. This makes our output voltage equal to 0 V when T = 0 °C. - Apply gain to the circuit to scale the output so that 0 °C to 100 °C is represented by 0 V to 10 V.
The voltage range of 0 V to 10 V is arbitrary, but is easy to measure accurately. Figure 3 shows a simplified version of Woodward's output circuit.

Figure 3: Output Amplifier Circuit.
We need to compute some resistor values for this circuit. I will use Mathcad for this part of the exercise. First let's define some terms and functions (Figure 4).

Figure 4: Definitions for Computational Work.
We now need to derive an expression for the output voltage from the op-amp in terms of resistors (Figure 5). Note that some expression were long and are chopped in Figure 5. That happens sometimes.

Figure 5: Solve for the Op-Amp Output Voltage.
These resistor values work for the circuit of Figure 3, but VOffset is a small value that is difficult to generate directly. Woodward used a Thevenin equivalent circuit to generate the offset voltage and required input resistance. I compute these values in Figure 6.

Figure 6: Thevenin Equivalent Circuit for Generating the Offset Voltage.
All resistances are now determined. The capacitor values are not particularly critical and I will not go into detail as to how they are selected.
Circuit Sequencing
The circuit is a bit confusing until you see that it uses a two-bit counter to cycle through the stimulus current values (see Figure 7). This counter applies currents to the transistor sensor in the order I1, I1+I2, I1, I1+I3. If you look at the circuit carefully, you will see that Woodward is using the multiplexer to charge the 1 μF capacitors with the proper polarities so that their sums generate ΔV1 and ΔV2. It is a little tricky, but just look at Figure 7 carefully and you will see how he does it.
Schematic
I have included the schematic for reference in Figure 7 (Source).

Figure 7: Woodward Schematic.
Conclusion
This circuit is very representative of Woodward's work. His circuits are fine examples of applying component physics in an economical fashion to real-world applications. I will have a few more posts that cover some of his other work.